Brief
Systems and Processes:
Utilise and understand differences in camera sensor technology in the production of photography.
Utilise a range of systems relevant to contemporary photographers.
Report on materals, techniques and processes relevant to contemporary photographers.
Discuss key organisational 'tools' for future modules.
*Research a range of Equipment available.
*Health and Safety Infomation.
*Fire and Evacuation procedures.
*Library and HESC infomation.
*Digital SLR use (notes, handouts, camera manual use)
*Digital contact sheet example from a picture project.
*Notes and handouts from sessions.
*Storage details of how you store your images.
*Editing and Manipulation software details you use.
A4 Prints: In an A4 print box such as:
*Shallow depth of field Portrait
*Landscape (using hyper focal point theory)
*Vase of Flowers
*Great British
*Enviromental Portrait
*Triptych
Deadline: 7th January 2013
Health and Safety

Safety in the Studio:
* Ensure all Cables are tucked away from other peoples harm, taping things down to reduce risk of tripping.
* Check all light fittings and Cameras are secure on stands/tripods.
*Sufficient space for other people to move about the studio without
causing any hazards or collisions.
*Avoid Unecessary light Exposures eg: Strong flash light can cause damage to peoples eyes.
*While Putting Equipment away never lay anything on top of hot lamps, ALWAYS ensure lamps have cooled.
*Attachments should always be fitted Prior to turning on the lamps to reduce risk of burns, If you desire to change attachment during a shoot, always switch the lamp off and leave to cool before doing so.
* Equipment should be put away properly to reduce breakages and collisions.
* Lights on stands moved to the sides of studio against the wall to stop tripping and create more space for others.
Safety on Location:
* Check all Eqiupment is working prior to shoot.
* Be aware of your surroundings, property could get stolen.
* Ensure you Equipment is Insured.
* Weather conditions such as rain could cause breakages.
Safety in the Darkroom
*The darkroom has very little light to see, ALWAYS store bags and property in a place where it cannot cause a hazard, such as under a large bench or as recommended out of the Darkroom.
*Chemicals and Water away from work surfaces and Electrics.
*Do not touch Electrical Equipment with wet hands such as, enlargers, timers etc.
*Wear protective gloves to avoid prolonged contact with photographic chemicals, Use the printing tongs provided to take extra care.
*Always wipe up spillages right away from dry surfaces.
*Avoid putting fingers in your mouth or from rubbing eyes. If this accures seek medical attention right away and take chemical bottle with you.
*Cuts or grazes should be protected with a waterproof plaster and removed once finished in the darkroom because chemicals will still be on plaster.
*Avoid putting fingers in your mouth or from rubbing eyes. If this accures seek medical attention right away and take chemical bottle with you.
*Cuts or grazes should be protected with a waterproof plaster and removed once finished in the darkroom because chemicals will still be on plaster.
*Do not carry chemicals around in printing trays, cause spillages and tripping.
*Always wash hands after you have finished.
*Make sure you keep the darkroom clean and ready for others to use.
*Do not take food and drink into the darkroom.
* Be careful not to mix water with the chemicals, This can sometimes be very harmful.
Safety at your workspace or computer

* Be careful not to mix water with the chemicals, This can sometimes be very harmful.
Safety at your workspace or computer

*The user should take breaks when spending long periods of time at the computer.
*Seating should be adjustable to make the experience more comfortable eg: Height and Tilt.
*Footrests should be provided if requested.
*Seating must be stable, easy freedom of movement and attain comfortable working position.
*Sufficient space in front of keyboard to support wrists.
*The keyboard should be tiltable and seperate from the screen.
*Keyboard must have matt surface to avoid glare/reflection from screen.
*The image upon screen must be free from flicker, stable and clear.
*There must be adjustments on screen to change brightness and contract to reduce discomfort.
*Characters on keyboard should be well-defined and adequate size and spacing.
* Keep mouse at easy reach.
*Screens should be kept clean to reduce straining.
*Changing position regularly.
Fire and Evacuation Procedures

In Case you see a fire:
* If You see a fire, sound the nearest alarm.
* Do not try to solve them problem yourself.
* Tell another member of staff where to find the fire.
* Leave the building by safe route and find your fire assembly point.
In Case you hear the fire alarm:
* Leave the building right away by a safe route.
* Look for the 'Green man' sign shown below to find safe routes out of the building.

* Leave in a safe and mature manner, no running as this could cause hazards for others.
* Do not stop to collect valuables because this could cause you to be at risk of harm, rooms will be locked for security reasons.
* Do not use the lifts.
* Find your fire assembly point, sign looks this below.

* Listen for your tutors calling your name out from register.
* Do not re-enter the building until a member of staff has said it is safe to do so.
Wheelchair users:
* While on the ground floor, wait until the path is clear then exit the building in a safe route.
* If you are on the upper level move to a stairwell or refuge point away from the direction of fire.
* Wait until help arrives, your support worker will stay with you until then.
* You may be allocated another wheelchair which are used during fire evacuations.

University assembly point.
First Aid:

* Emergancy telephone number is Extension: 2222.
* Your next of kin will be called.
* Ambulance will take you for medical help.
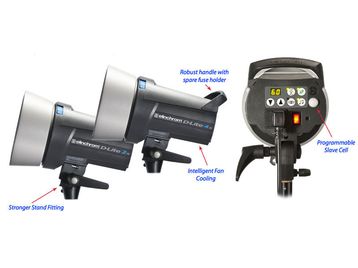
Equipment Available

Elinchrom lamp and softbox. Image taken from google images.
Softboxes create a more all round light but also a softer light.
These work really well on glass subjects because it creates a nice long highlight.

Sync Lead. Image taken from google images.
These are used to sync the flash light with the shutter of your camera.
You attach this to your camera and light source.
Some cameras may need a Hotshoe attachment.

Beauty Dish, Image taken from google images.
You can buy these in two colours on the inside such as silver and gold.
The gold dish creates a nice brown tint to skin making subject look naturally tanned.
These work really well on portraits because the light source falls beautifully onto subject.

Snoot, Image taken from google images.
The snoot is great for lighting objects and focused interest.
Different coloured gels are bought with the Snoot which is great for creating coloured scenes.
A Honeycomb attachment is sometimes sold with the product which makes a softer light.

Shallow Depth of Field (Picture project 1)
Research
Main subject will be in focus but the background and sometimes foreground depending where subject is will be out of focus.


My Work

My son Levi playing in the garden...
Picture was taken with an Olympus E-420, camera was set on aperture priority.
Settings: F3.5, 1/125 and ISO 400.
I changed the colour to monochrome because I thought it would look better.

My little girl Madison swinging on her park.
Again picture was taken with an Olympus E-420 and camera
Settings: F8, 1/100 and ISO 400.

My sister and Friend..
Nikon D300s and Manual setting
Settings: F8, 1/100 and ISO 400.

My Bearded dragon.
Nikon D300s and Manual Setting
Settings: F2.8, 1/250 and ISO 100.

Landscape (using hyper focal distance point)
Picture project 2
Research


My Work

Vase of Flowers (Picture project 3)


Research


Image from: http://www.visualnews.com/2012/11/01/smashing-vases/

Image from: http://thecustomizewindows.com/2011/09/vase-and-flowers-digitally-created-3d-wallpaper/

Image from: http://www.decor4all.com/diy-decorative-vases-inspiration-glass-tube-vase-designed-aurelle-richard/19428/
My Work


Great British (Picture project 4)


Research
My Work


Enviromental Portrait (Picture project 5)
Research
My Work


Triptych (Picture project 6)

Research
My Work
No comments:
Post a Comment